WebSphere & ApacheDS quick setup guide
This article explains how to quickly configure WebSphere with Apache Directory Server (ApacheDS) for LDAP authentication. We will use the ApacheDS server that comes packaged with Apache Directory Studio. This has the advantage that we only need a single tool to set up the LDAP server and to populate the directory. Obviously the setup described here is not meant for production uses; the goal is to rapidly create a working LDAP configuration for testing purposes. It is assumed that the reader is familiar with configuring security (and in particular standalone LDAP registries) in WebSphere. No prior experience with ApacheDS is required.
Start by setting up the LDAP server:
-
Download, install and start Apache Directory Studio. The present article is based on version 2.0.0-M8, but the procedure should be similar for other versions.
-
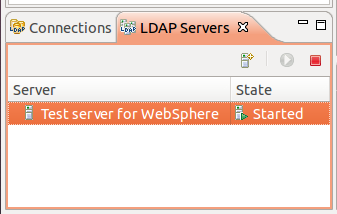
Using the “Servers” view, create a new ApacheDS server. There is no need to change the configuration; the default settings are appropriate for a test server. After the server has been created, start it:

-
Create a connection to the server. To do this, right click on the server and choose “Create a Connection”. The new connection should then appear in the “Connections” view. Double click on the connection to open it. You should see the following entries in the “LDAP Browser” view:
dc=example,dc=com,ou=config,ou=schemaandou=system. -
Create two entries with RDN
ou=usersandou=groupsunderdc=example,dc=com, both with object classorganizationalUnit. -
For each test user, create an entry with object class
inetOrgPersonunderou=users. For the RDN, useuid=<username>. Then fill in thecnandsnattributes (cnis the common name which should be the given name plus surname;snis the surname alone). Also add auserPasswordattribute. -
Under
ou=groups, create as many groups as needed. There should be at least one group that will be mapped to the administrator role in WebSphere. For the object class, one can use eithergroupOfNamesorgroupOfUniqueNames. They are more or less the same, but the former is easier to set up, because Directory Studio will allow you to select members by browsing the directory. For the RDN, usecn=<groupname>. When usinggroupOfNames, Directory Studio will automatically open a dialog to select the first member of the group. Additional members can be defined by adding more values to thememberattribute. -
Also define a
uid=adminuser that will be used as the primary administrative user in the WebSphere configuration. Since this is not a person, but a technical account, you can use the object classesaccountandsimpleSecurityObjectto create this user. Note that theuid=adminuser doesn’t need to be a member of any group.
The resulting LDAP tree should look as follows:

You can now configure the standalone LDAP registry in WebSphere. The settings are as follows:
-
Primary administrative user name:
admin -
Type of LDAP server: Custom
-
Host/port:
localhost:10389(if you kept the default configuration for ApacheDS, and the server is running on the same host) -
Base distinguished name:
dc=example,dc=com
You also need to specify the following properties in the advanced LDAP user registry settings:
-
User filter:
(&(uid=%v)(|(objectclass=inetOrgPerson)(objectclass=account))) -
Group filter:
(&(cn=%v)(|(objectclass=groupOfNames)(objectclass=groupOfUniqueNames))) -
User ID map:
*:uid -
Group ID map:
*:cn -
Group member ID map:
groupOfNames:member;groupOfUniqueNames:uniqueMember
